Non-fungible tokens, or NFTs, are a relatively new type of digital asset that’s growing in popularity among everyone from celebrities to art appreciators to regular investors alike. NFT trading revolves around digital items such as paintings, music, photos, memes and other products that come complete with their own unique proof of authenticity and ownership. Investing in NFTs has become a popular strategy lately, and dealing with NFTs has the added bonus of providing an easy way to get involved with trading cryptocurrency.
Although it can seem like buying and selling NFTs is the digital equivalent of auctioning off a Picasso — some NFT artwork has sold for more than $500 million — it’s surprisingly accessible to beginning investors. If you’re not sure about shelling out some hard-earned crypto coins to make a purchase, however, approaching it from the opposite angle might be a strategy that suits your needs better. You can create and sell your own NFT instead of buying another artist’s to resell later. Here, we’re breaking down the basic steps in the NFT-creation process to help you determine whether it’s the right investing avenue for you.
Choose the Content You Want to Sell
First things first. Considering that an NFT, while digital, is essentially a product with its own unique authentication signature, you’ll need to create a product so you have something to sell. “Unique” tends to be the name of the game when it comes to NFTs — not only in terms of their digital originality but also in their content. While you can create an NFT out of anything from a social media post to an in-game collectible to a picture of your cat, it’s more important to consider what’s going to inspire someone to actually purchase it.
Popular NFTs cover a broad range of mediums. For instance, a now-legendary NFT artist named Beeple spent 5,000 days creating a new digital print each day before combining them into one large piece called “Everydays: the First 5000 Days,” which sold for nearly $70 million. On the other hand, former Twitter CEO Jack Dorsey made over $2.9 million simply by selling an NFT of the first tweet he ever created.
The point is that, like all art, some NFTs are incredibly complex and involved, and others are very simple. Think about what type of content you want to sell and the “hook” that makes it unique. While you’re probably not going to start selling your NFTs for millions right out the gate, having a distinct style, niche or brand can go a long way in helping you get started. If you’re already an artist, digitizing your work and selling it online could be the way to go. Even if you don’t consider yourself much of a creator, using your imagination is key; anything you turn into an NFT could be seen as meaningful to someone who’s willing to purchase it.
Create a Digital Wallet

This part can seem a bit intimidating, but it’s not as complicated as it may initially look. Before you create and sell your NFT, you’re going to need a digital wallet, which allows you to connect to the NFT marketplace where you choose to sell your pieces.
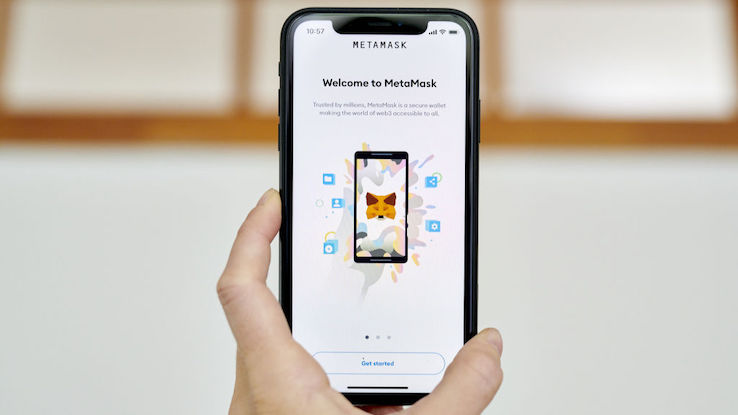
One of the most common wallets and the one that comes highly recommended due to its widespread use is MetaMask. MetaMask is available as both a mobile app and browser extension. Once you sign up for MetaMask, you’ll be assigned a digital wallet. You can either transfer cryptocurrency (most commonly Ethereum, or ETH) that you already own into your MetaMask wallet or purchase it directly from the app.
Before we get into connecting your wallet to a marketplace, let’s first go over why you need one in the first place. An important part of what makes a piece of digital art an NFT is a process called minting. What separates an NFT from a regular piece of media you’d find online is that it can be digitally tracked as part of a digital blockchain. This is similar to the way physical coins become official currency through the process of minting. When your artwork is minted, it’s assigned a unique, tamper-proof digital “signature” that serves as proof of its authenticity — that it’s the original digital work you created, not a copy someone made. The connection between your wallet and the minting process should start to clear up a bit in the next step.
Choose the Marketplace Where You’ll Create and Sell Your NFT
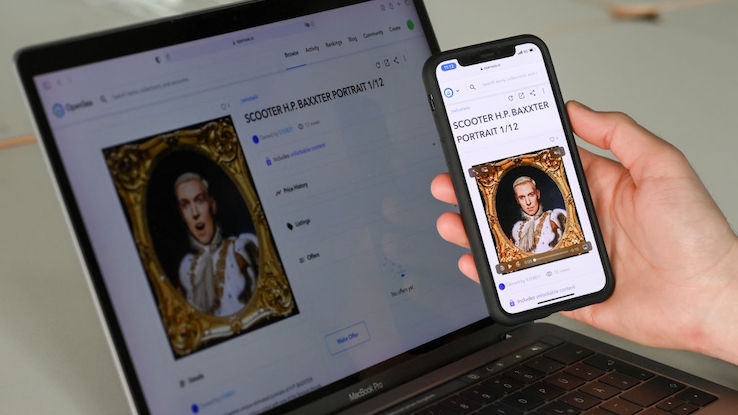
Fortunately, many of the most popular NFT marketplaces also make the process of minting your NFT relatively simple. One of the most popular NFT marketplaces is called OpenSea, and it’s a great place to start. Other common platforms for beginners include Mintable and Rarible, both of which make minting and selling your NFTs easy. Once you get more established, you’re also likely to become familiar with more high-end or niche-specific marketplaces like SuperRare and Known Origin, but for the sake of simplicity, let’s assume you’re starting with OpenSea.
First, you’ll want to log onto the app and create an account. Then, you’ll connect it to your MetaMask digital wallet account. From there, turning your digital art into an NFT involves some simple steps:
- Open your profile
- Click “create”
- Make sure your file is saved in a supported format (JPG, PNG, GIF, etc.). If you’re selling visual artwork, it’s not a bad idea to review OpenSea’s sizing recommendations as well
- Select and upload your artwork file to your OpenSea account
- Customize your piece by adding details and even unlockable content
- Select the blockchain you want to use to mint your NFT
Choosing the blockchain to use to mint your NFT will likely play a large role in how expensive it is to list the item for sale. While ETH is a widely used blockchain for minting, it’s also gotten pretty expensive. That’s because of something known as gas fees.
Gas fees represent what you pay to actually mint your NFT. The amount you’ll owe depends on traffic, supply and demand, along with the amount of computing power it takes to complete the minting process. While gas fees fluctuate, they can hover at or beyond $100 if you choose to use the ETH network. However, if you’re looking to cut costs, you might want to opt for another blockchain, such as Polygon or Klaytn, both of which are substantially cheaper or even free. Additionally, you may want to explore an option known as “lazy minting,” which allows you to defer the minting process until your item sells.
And, Finally, Sell Your NFTs

When you’re ready to sell your NFT, select it from the items in your profile and hit the “sell” button. You’ll then be able to choose precisely how you want to go about selling your item. Some of the options include:
- Setting a fixed price. Keep in mind that NFTs operate on blockchain technology, so the price will usually show up in the form of a cryptocurrency like ETH. Make sure you know how much your set price converts to in USD so you can determine a realistic price range
- Offering your item at auction
- Setting the duration of your sale
- Reserving the item for a specific buyer
- Offering the item as part of a bundle
At this point, you’ll also be able to specify things like whether you want to sell the copyright along with the artwork and whether you’d like to collect creator royalties each time the item sells. Once you select the blockchain of your choosing, you’ll follow the directions on your screen and sign a virtual “contract” to authorize the minting process.
Note that if you choose to use ETH, there may also be a one-time gas fee for initializing your wallet. When your item is done minting, you’ll have succeeded in creating your first NFT and posting it online for sale.


